Klaviyo
Klaviyo is an email marketing and automation platform. It allows businesses to send personalized email campaigns and automate marketing actions based on customer data. With Klaviyo, you can gather data, segment the audience, and generate reports to improve engagement and sales.
Features and Specializations
- Email Marketing: Klaviyo specializes in email marketing, offering specific integrations and features.
- Personalized Workflows: Create highly personalized and rule-based automated workflows to send welcome emails and follow-ups.
- Segmentation Options: Utilize customer data and purchase behavior for segmentation, enabling you to send highly personalized and relevant messages.
- Reporting and Analysis: Klaviyo provides comprehensive reporting and analysis on the performance of email campaigns, helping you evaluate effectiveness and make informed decisions.
Integration
To integrate Klaviyo and set up an application, the following prerequisites are required:
Create Account
You need to have an active account on Klaviyo. If you don't have one yet, you can create an account on the official Klaviyo website.
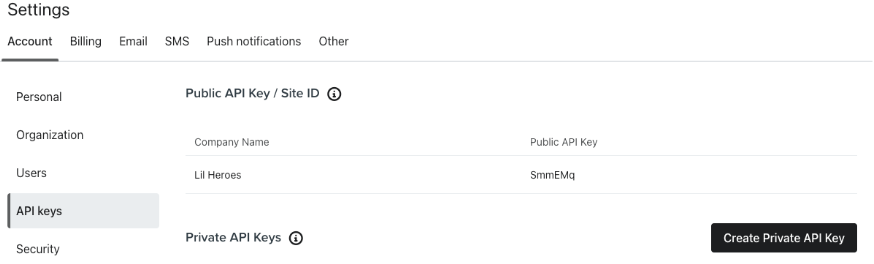
Create a Private API Key
You will need a Klaviyo API Key. This key will allow you to access the Klaviyo API to make requests and manage email data and subscribers. You can find this API key in your dashboard by going to Settings and then the API Keys tab.
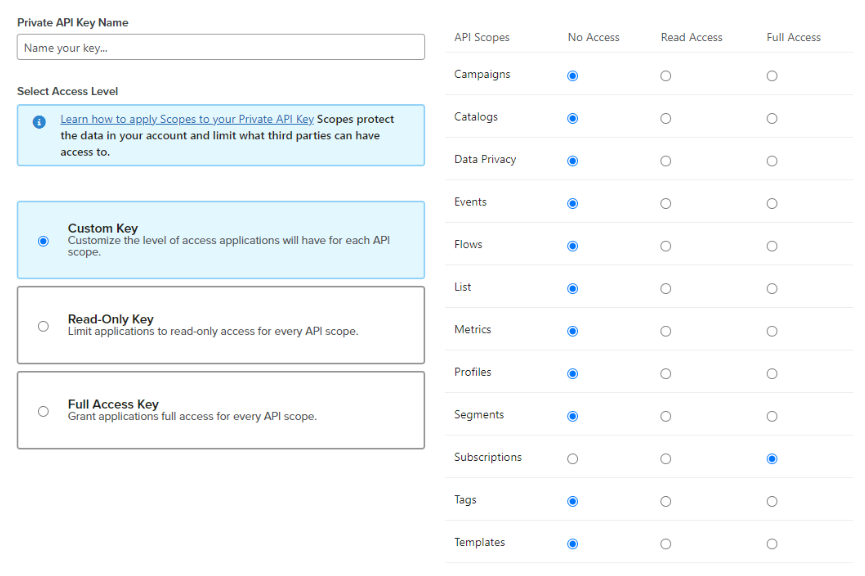
While you are creating the API Key, you have to take into account the scope that you are going to use, which can be found in the API endpoint documentation.
For example, in this document, we are going to use the Subscribe Profile endpoint, which requires the following scopes:
- list:write
- profiles:write
- subscriptions:write
Dependencies
It is important to note that these are general requirements and may vary depending on the specific details of your implementation and the functionalities you wish to use with Klaviyo in your Next.js application. You can choose to use the Klaviyo SDK or the API. In this example case, we will be using the API directly using axios.
Authentication
Klaviyo supports authentication using access tokens (API keys) to ensure proper access to API resources. It is crucial to include the API Key in the authorization headers. You can do this by adding an "Authorization" header with the value "Klaviyo-API-Key api_key". For example:
headers: {
    Authorization: `Klaviyo-API-Key ${process.env.API_KEY_KLAVIYO}`,
}
Create Profile
Profiles are individual records that contain detailed information about customers. Each profile represents a unique person or entity with whom you have a business relationship. These profiles are essential for the functioning of Klaviyo and play a central role in marketing strategies.
The "Create profile" endpoint is used to create new profiles in Klaviyo. It is useful when we want to add new customers or contacts to our profile database. When creating a profile, we can provide information such as name, email address, phone number, and other relevant details.
Example request
export const klaviyoSubscribe = async (email: string) => {
  try {
    const { status } = await klaviyoAPI.post(klaviyoConfig.subscribe.url, {
      data: {
        type: klaviyoConfig.subscribe.type,
        attributes: {
          list_id: process.env.KLAVIYO_LIST_ID,
          subscriptions: [
            {
              email,
            },
          ],
        },
      },
    });


    if (status === 202) {
      return {
        success: true,
      };
    } else {
      return {
        success: false,
      };
    }
  } catch (error) {
    return { errors: error.response.data.errors };
  }
};
Subscribe
The difference between the "subscribe" and "create profile" functions in Klaviyo lies in the purpose and workflow they offer:
The "Subscribe" endpoint is used to add contacts to a specific subscription list in Klaviyo. You will need to provide the list ID when using this endpoint. When a user is subscribed, a user profile is automatically created.
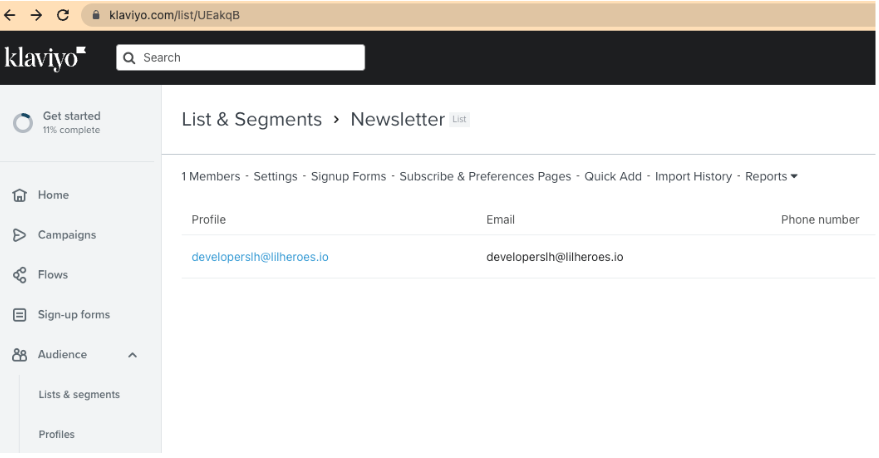
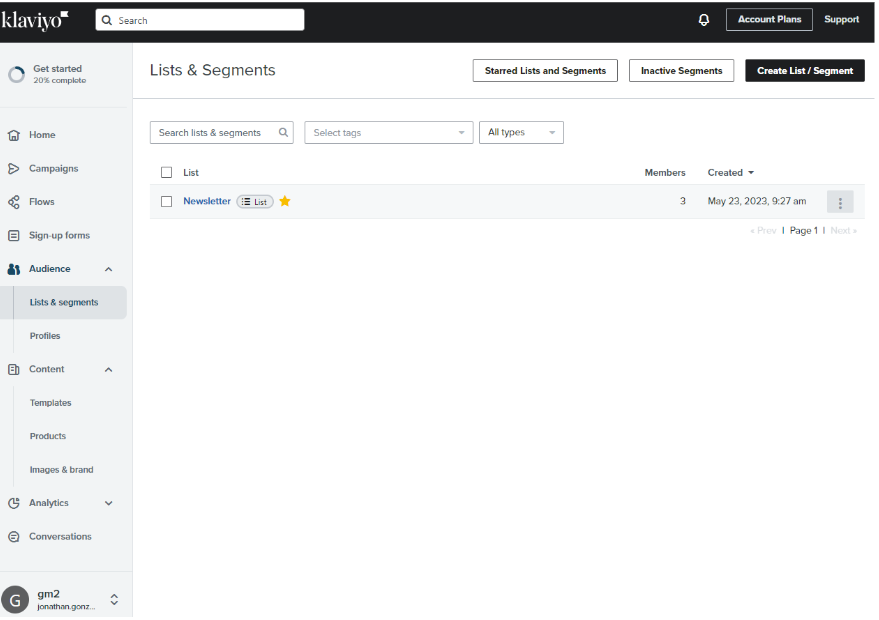
To use this endpoint, you first need to create a list in Klaviyo. You can do this by going to Audience > List > "Create List / Segment".

Next, go to your new created list and get the list id from the URL, in this case is “UEakqB”.
You can also get this ID by going to “Settings”.
Example request
    {
    method: 'POST',
    url: 'https://a.klaviyo.com/api/profile-subscription-bulk-create-jobs/',
    headers: {
      accept: 'application/json',
      revision: '2023-02-22',
      'content-type': 'application/json',
      Authorization: `Klaviyo-API-Key ${process.env.API_KEY_KLAVIYO}`
    },
    data: {
      data: {
        type: 'profile-subscription-bulk-create-job',
        attributes: {
          list_id: process.env.API_LIST_ID,
          custom_source: 'Marketing Event',
          subscriptions: [
            {
              email: 'matt-kemp@klaviyo-demo.com',
              phone_number: '+15005550006',
              profile_id: '01GDDKASAP8TKDDA2GRZDSVP4H'
            }
          ]
        }
      }
    }
  }
List dashboard
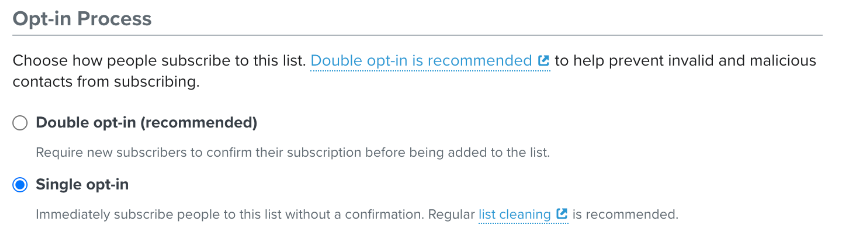
List management and segmentation: We can create and manage subscriber lists, segment the audience into specific groups based on different criteria. This allows for sending more personalized and relevant messages to different segments of your audience.
Something important when you create a list, is to select if users accept the subscription by email or subscribe automatically without any kind of confirmation. (In settings page)